Inside the Workspace · Updated October 6, 2026
How do I edit images inside a PDF without a separate app?
Short answer
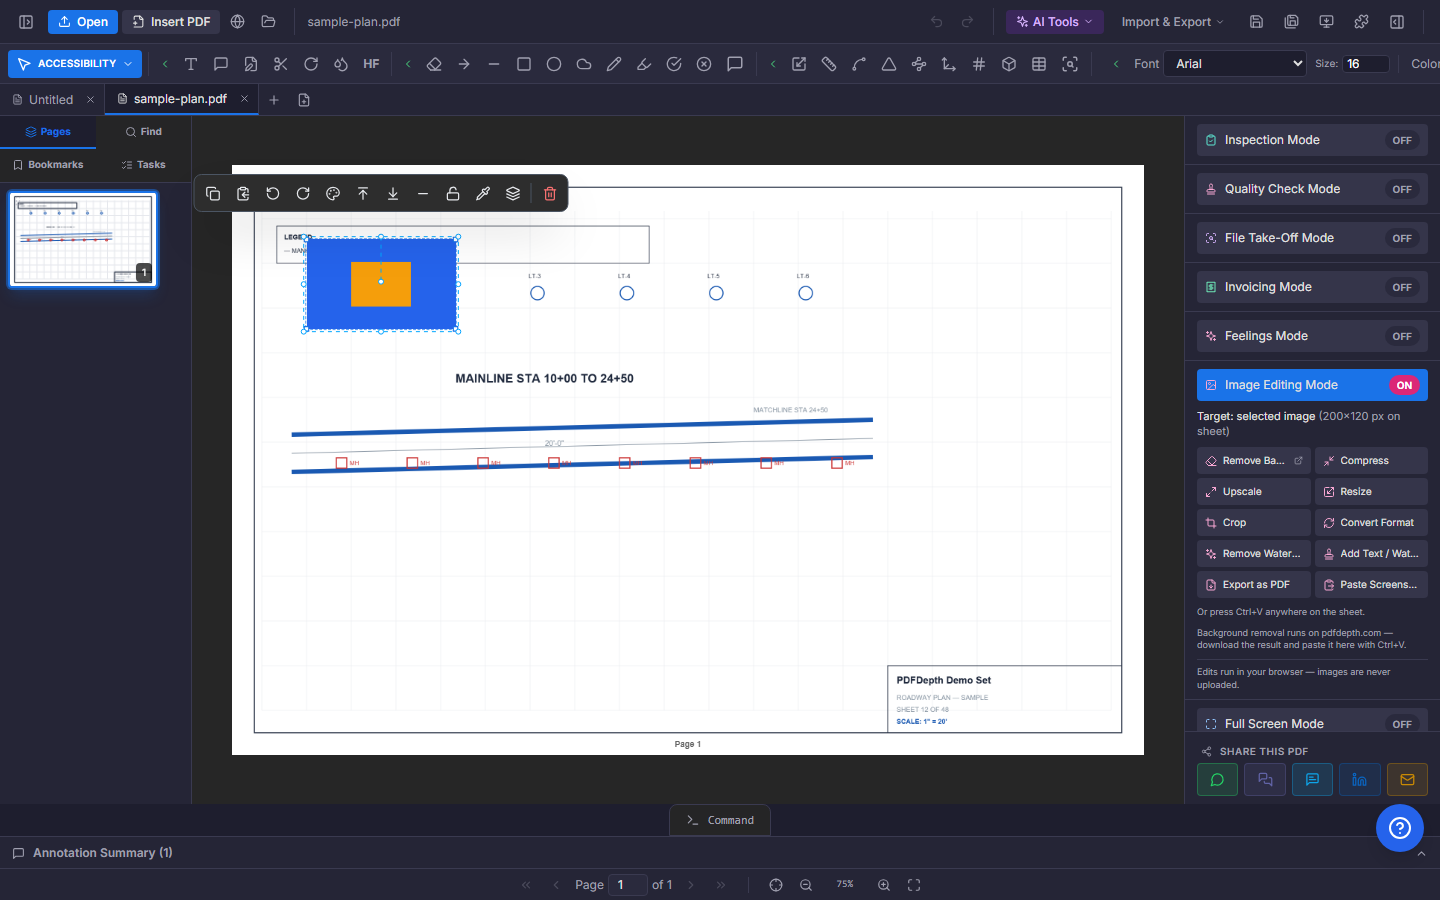
Open Image Editing Mode in the right panel and click an image to target it — or target the whole page rendered as an image. Local tools (compress, upscale, resize, crop, format conversion, watermark removal, watermarking) run entirely in your browser with preview-then-apply dialogs, while an AI section handles object-level edits, restyling, background changes, and generative expansion on your own Gemini key. Edits land on the PDF itself — no export, edit, re-import loop.
Two targets: the image or the page
Select an image on the sheet and it becomes the target — the panel shows its pixel size and every tool applies to it. With nothing selected, the target is the current page rendered as an image, which is how you photo-edit a scan or a flattened page.
Page edits flatten: the page is replaced by the edited image, so live text and vector linework would be lost — the panel warns you when that is the case, records an undo entry, and offers a "Revert last page edit" button that restores the pre-edit page. Editing a placed image updates the annotation in place instead, with nothing flattened.
The local toolbox — nothing uploaded
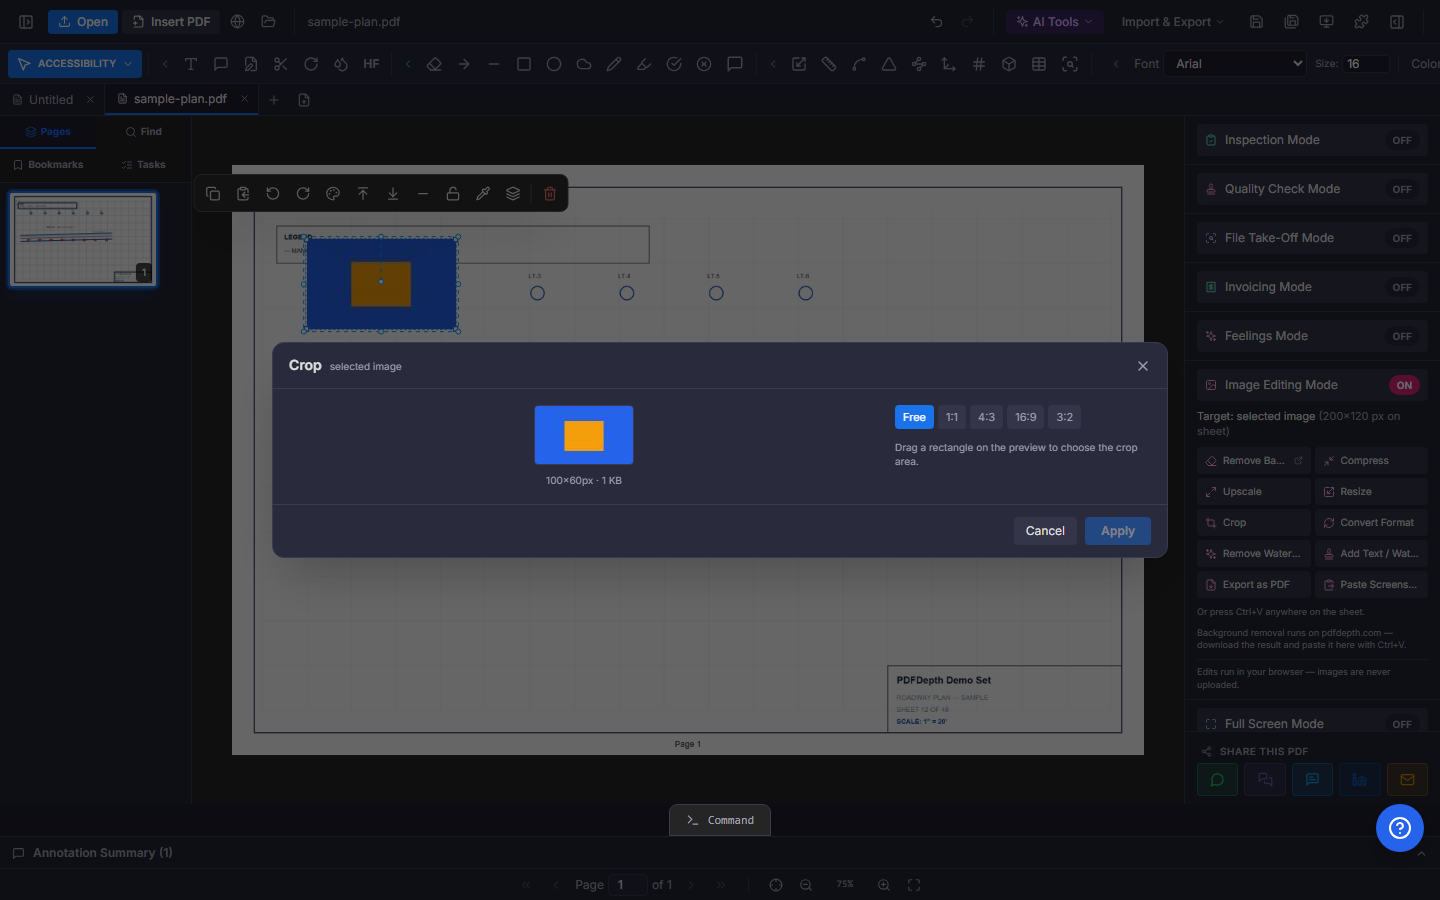
Each tool opens a preview dialog — run it, inspect the result, then Apply or cancel. Three neighbours round out the panel: "Export as PDF" turns the selected image or page into a PDF, "Paste Screenshot" drops the clipboard onto the sheet (Ctrl+V works anywhere on the page), and "Remove Background" opens the free in-browser remover on pdfdepth.com.
- Compress — quality slider (10–95%), JPEG or WebP output, with before/after sizes shown.
- Upscale — 2× or 4× enlargement by high-quality resampling plus sharpening; it is honest about not inventing detail.
- Resize — exact pixel dimensions with aspect-ratio lock and percentage shortcuts.
- Crop — drag a rectangle, free-form or locked to 1:1, 4:3, 16:9, or 3:2.
- Convert Format — PNG, JPEG, or WebP, choosing a background color when flattening transparency into JPEG.
- Remove Watermark — drag boxes over the mark and the regions are inpainted locally.
- Add Text / Watermark — text or a logo image at nine positions plus a tiled pattern, with size, color, and opacity.
Recoloring and retouching
A placed image can also be recolored straight from its hover toolbar: the color editor extracts the image’s dominant colors and lets you remap each one to a new value — a one-click way to push a photo or logo toward brand colors — with an optional background fill for transparent regions. The same editor appears when you cut a region and paste it back as a transparent overlay.
There is no brightness/contrast filter stack here — color work runs through the dominant-color remap or the AI style tools below. The honest split: precise local operations stay local; anything that has to invent pixels goes through the AI section.
AI edits in place
The AI Edit section sends the target to the Gemini image model — it needs your API key in Settings, and the image leaves the device for those calls. The tools cover region edits on a marked area, adding or removing objects and people, replacing one thing with another, whole-image restyling (oil painting, watercolor, cinematic, sketch), clothing and appearance changes, background swap or extension, blending up to three reference images, generative aspect-ratio expansion, and designed text insertion — business card, flyer, poster, invitation, brochure, resume, certificate, letterhead, social post, story, and thumbnail layouts.
Magic Layer sits alongside: it detects the distinct objects in the image — up to a dozen, with labeled boxes you tick or untick — then lifts each chosen object into its own movable image layer, optionally reconstructing the background so moved objects leave a clean plate behind.
Passport photo, quietly included
The panel also hides a passport-photo maker: upload a headshot, drag it under the 2×2-inch crop frame, and set three markers — crown, eyes, chin. A live compliance checklist reports the U.S. requirements it can measure — 600×600 px at 300 dpi, head height 25–35 mm, eye position, headroom, focus, natural color, and a plain light background — and flags the ones you must verify by eye. A whiten-background control with a tolerance slider cleans up the backdrop, and the output downloads as the photo or as a Letter-size print sheet holding nine exact 2×2-inch photos that print true size at 100%.
Doing it in PDFDepth
Right panel → Image Editing Mode. Click a placed image to target it, or leave nothing selected to edit the page as an image. Pick a tool, check the preview, Apply — and the result stays inside the document, ready to export, sign, or share like the rest of the PDF.
Everything in this article runs in the live PDFDepth workspace — the same app the workflows above were verified against.
Key takeaways
- One panel edits a placed image or the whole page-as-image; page edits flatten with a warning and a one-click revert.
- Compress, upscale, resize, crop, convert, watermark removal, and watermarking all run locally — nothing is uploaded.
- AI edits (Gemini key) handle the generative work: object add/remove/replace, restyle, background, aspect expansion, designed text.
- Passport Photo outputs a compliant 2×2-inch U.S. photo plus a nine-up print sheet — free, in-browser.
Related questions
Local tools run entirely in your browser. The AI Edit section and Magic Layer send the image to the Gemini image model under your own API key; Remove Background opens the free pdfdepth.com tool in a new tab.
Do it in PDFDepth
In the app: Right panel → Image Editing Mode
Try it free — no signup, no upload
Related articles
Put it into practice
Everything above runs inside the PDFDepth workspace — free for 14 days, no credit card.
Start for Free